Rhubarb is pretty interesting stuff. How many plants can you think of where you eat the leaf stalk? (Ok, maybe onions technically, but you get what I mean.) It is also the easiest thing on the planet to grow. It comes up every spring, nothing else in the world eats it, and you never have to look after it except maybe to divide the clump once in awhile to make even more of it.
As you may have guessed, a rhubarb recipe is on the way.
But first, please have a beer.
Here's the clump of rhubarb, pre haircut. It is April 25th today, and the season is a little farther along than usual. The plant has lost it's creepy triffid/invasion-of-the-body-snatchers look and moved to a more respectable earthly clump of green.
After a quick trim, the alien scare returns in the shape of a forming flower stalk (see that yellowish thing in the middle?). But, still not too bad -- and as you can see, it hardly looks diminshed by the harvest. Plenty more where that came from!
This recipe calls for 2 lb. of rhubarb (about 20 leaf stalks), half a cup of white wine, half a cup of sugar, and a vanilla bean (sliced lengthwise -- skip it if you don't have one or use a splash of extract).
The recipe comes from the
Orangette blog, and I was interested in it because it involved baking the rhubarb, rather than stewing it in a pot on the stove. My grandma used to make this stuff all the time, and it made a stringy, soupy, goup that I actually quite enjoyed (with vanilla ice cream ... mmmmmm!) I was intrigued at the possibility of something a little drier and more ... I dunno ... baked. So I gave this recipe a whirl. But it still makes a stringy, soupy, goup that I quite enjoy.
First, you have to trim the rhubarb leaves. Do this outside, and send the leafy parts straight to the compost. That little knife is a cool tool I got from Lee Valley. It's some Japanese thing, but it is very handy in the garden. It's also useful for scaring the daylights out of neighbourhood kids when you head out to harvest something -- especially if you hunch your back, drag one foot behind you, and speak with a Russian accent -- you know, stuff like "Bad Igor, bad Igor...!"
Give the leaf stalks a quick rinse, then...
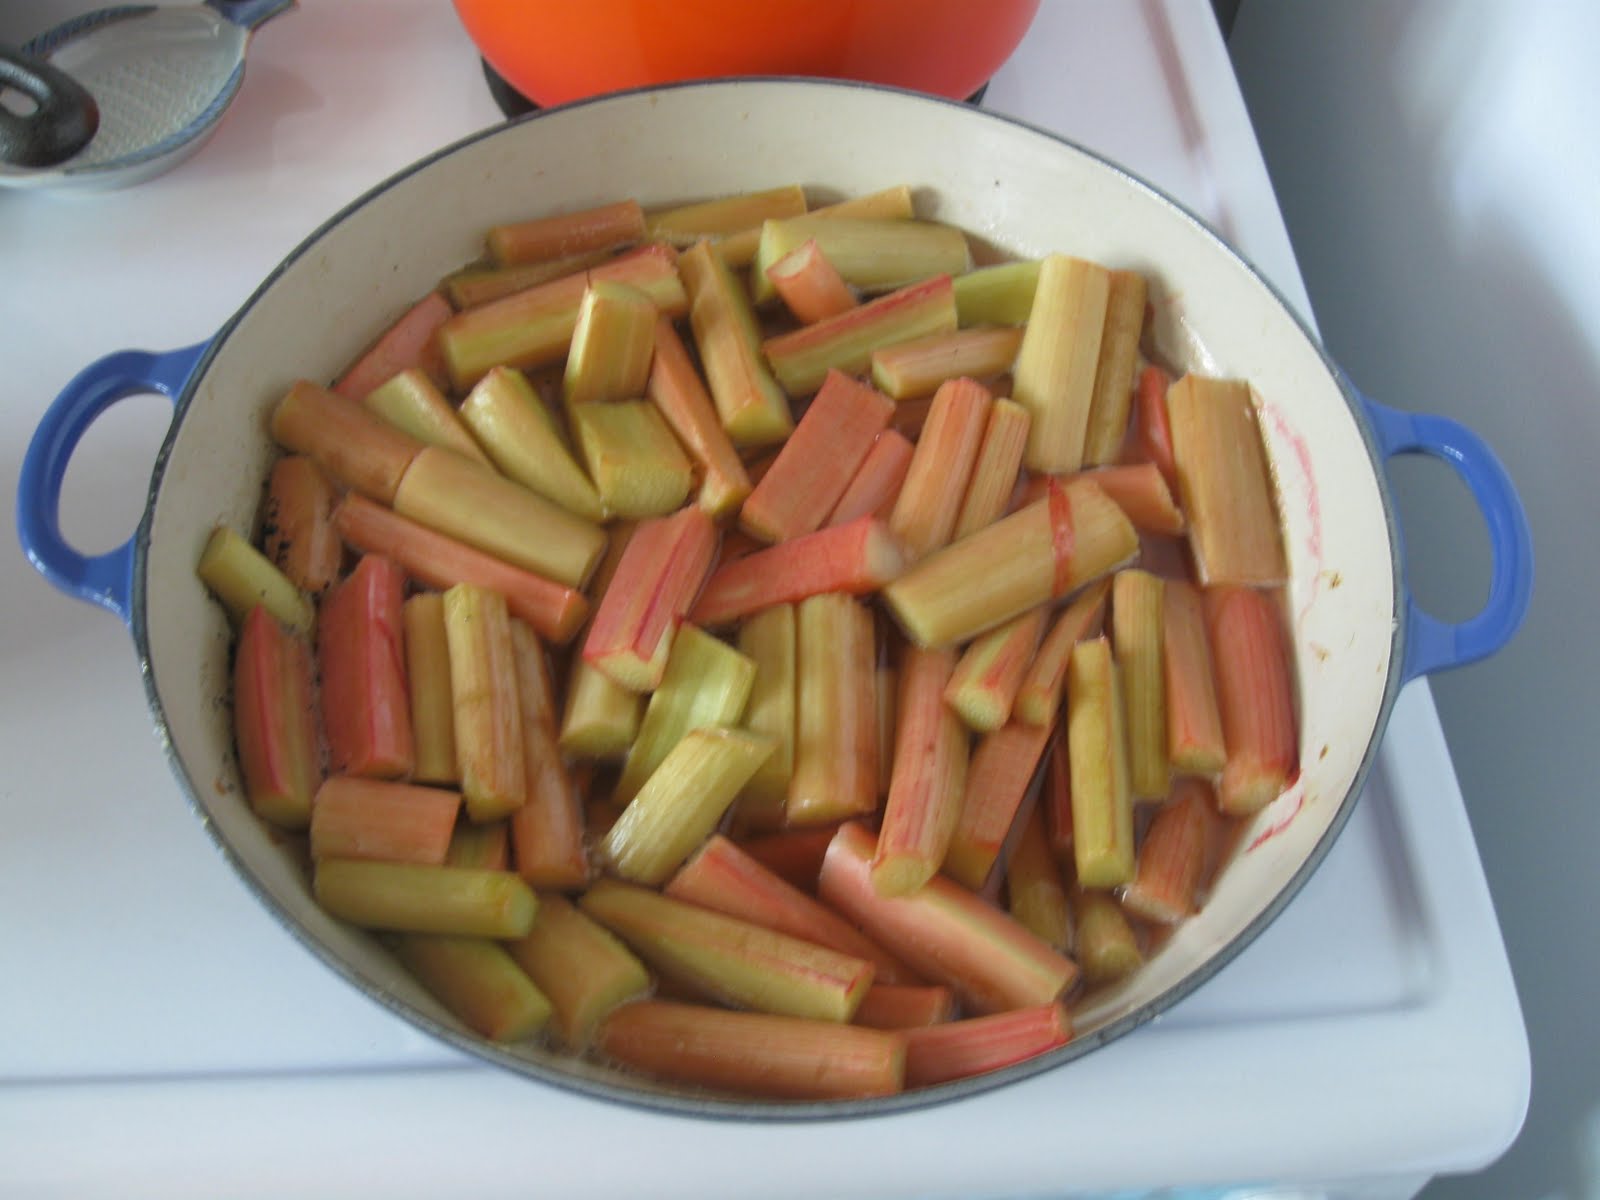
chop them into three inch chunks (more or less -- less if you want shorter strings), put them in a Dutch oven or other deep, oven proof pot, add the whine (hahaha spelling mistake, I think I'll leave it), sugar, and vanilla bean, mix it with your hands, and then and pop it in the oven at 350 for 30 minutes. At the half way point, give it a stir to mix things around a bit.
After half an hour, it's all done. I am told you can eat it at this point, but if you want to go the extra mile (and I hope you do, dear reader) then read on!
My grandma also used to make this wonderful apple crisp. It turns out that it was actually an apple
Betty, but who knew? I never got the recipe for it, and kept trying crappy approximations that involved oats and other dusty topping components. Then, one fateful day, I came across an apple crisp recipe on a package of brown sugar. No wonder -- it uses a ton of brown sugar. And, they were probably in cahoots with the butter people, since there is a whack of that in there too. Some people might find this too buttery, but not me, Oh no! I usually make a double batch for topping an apple crisp, but here is the single batch recipe for our rhubarb concoction. This amount of crisp yields a fairly sour end product -- I kind of like the tonic feeling of it, but it might be too much for some. You could double the crisp recipe to have a thicker, sweeter topping, or add more sugar to the rhubarb mix. Up to you!

For the crisp, you need 1 cup of packed brown sugar (ok, I only had yellow), 3/4 cup of flour, and 1/4 lb of butter (Or 2 cups brown sugar, 1 1/2 cups of flour, and 1/2 lb of butter if you want to go all out!) I am happy to finally have this recipe somewhere that I can find it, since I always seem to misplace the little slip of paper it's scribbled on.
Mix the flour and brown sugar. Then add the butter and cut it into chunks.
Use a pastry cutter or forks to start mixing the butter into the flour and sugar. (You could probably do this in a food processor, but I am a Luddite, and like to do it the sloooow way.) Eventually, you'll stop making progress with the pastry cutter. At this point just reach in there with your hands and massage it into a nice crumbly mixture. Stop once your hands start to heat things up too much and it starts melting and getting sticky in there. (No comment.)
Get some ramekins ready. It's a good idea to put them on a cookie tray since it is easier to move them in and out of the oven this way. These may be too big to be called ramekins, but it is the only word I have in my head for them at the moment. I like to bake crisps in these individual containers because I
don't like to try and figure out what to do with a half eaten pie plate of oozing crisp afterward. This way, you can serve them individually, and the ones you don't use get to sit all nice and tidy in the fridge til later. (Awesome breakfast or lunch idea!) By the way, if you don't want to make the rhubarb thing and want to go for apple crisp instead, just start here and fill the ramekins with chopped apples, maybe a couple of cranberries, a sprinkle of sugar and cinnamon, and keep on truckin'.
After you take the rhubarb out of the oven, crank it up to 375. Fish out your vanilla beans, since you'll never find them later. (Like my joke? See the fish? HAHAHAHA!)
Fill the ramekins with your roasted rhubarb (or raw apples). Try not to put much of the liquid in, since it will continue to get soupy as it bakes.
Top them with the crisp recipe. I used a small measuring cup to distribute it gradually over each little pot. Then pop them in the oven again for 30 minutes (45 minutes if you are using raw apples instead of rhubarb).
Remove the crisps from the oven and then (most important step!) let them cool for awhile. The rhubarb in there will be nuclear reactor hot, and will be too much to handle at this point. Giving it a while to cool will make it more palatable and will give the crisp topping a chance to firm up.
While you're waiting, you could go another extra mile....
by making some Calvados whipped cream! Just add a cup of whipping cream to a tablespoon of icing sugar and whip until stiff.
Then add a dash of Calvados (or brandy, or bourbon, you know) and mix a little more. (I didn't measure, but it was probably about a tablespoon of booze).
Top your crisp with whipped cream and enjoy! (This would also work with vanilla ice cream, but all I have in the freezer is dark chocolate and bacon ice cream, which probably wouldn't go. Ice cream is great because it is so cold and helps cool the rhubarb.) You'll have a nice crisp topping for sweetness; a sour, goupy, stringy middle for a tart, savoury zing; and cool whipped cream for a soothing, boozy finish. What more could you ask for?!
Bon appetit!


Calvados whipped cream?? Finally something I can use it for, since Ryan can't drink it fast enough! This sounds delish... I will be making this for sure (I have a ginormous ziplock of frozen rhubarb in the freezer that needs a home).
ReplyDeleteGreat! Hope you like it. (It is sour city, so feel free to boost the sugar if you want something a little sweeter.) It seems the Calvados whipped cream has struck a chord -- Francois sent me a comment on FB about it too!
ReplyDelete