Monday, August 23, 2010

'Za

Whenever I mention to someone that I made pizza from scratch on a weeknight, the reaction is usually along the lines of "Gee, must be nice to have all that time," or "you're a psycho," or something like that. It's not such a big deal, really, and you can have a lovely homemade pie on the table in about an hour and a half from start to finish. Here's how.

First, and most fundamentally, the dough.  I've seen people "make pizza" on a ready made crust, but it is not nearly the same thing. (I do make "mini-pizzas" on English muffins now and then for the kids, but that's a whole different creature -- like the difference between instant coffee and real coffee. Both incarnations have a time and a place, and as long as you don't think of one as a credible substiute for the other, then you won't be disappointed.) ANYWAY, onwards! The dough!

You need about 1 1/4 cups of warm water. I like to heat cold water in a saucepan rather than trust the warm water from the tap -- I mean really, the hot water heater must be SUPER gross inside. Use more water if you have more people to serve -- this yields enough dough for 4 smallish pizzas, two largish ones, and one mega-ya-ya-ya 'za! Add about 1/2 a tablespoon of sugar to the water and about 1 tablespoon of yeast.

Let the yeast and water bubble away until you are sure the yeast is alive and well. (If not, off to Loblaws!)

While you're waiting for this, add about two cups of flour to a big bowl. Sprinkle some dried oregano in there, and add several pinches of salt (about a teaspoon). Keep about 1 cup of flour on hand for adding later.

When the yeast is nice and frothy, add about a tablespoon of oil to it. Give the goop as stir, and...

...add it to the flour.

Start stirring gently with a spoon. Once the flour isn't in danger of flying around all over the place, stir a bit more vigorously.

You'll soon end up with a goopy mess. Add more flour, about 1/4 cup at a time, and stir some more. Eventually, stirring will become a major drag, so work the spoon out (flour will help you extract it).

Then start kneading with your hands right in the bowl (don't turn it out onto the counter, it just makes more mess -- working in the bowl keeps things nice and tidy). Gradually add more flour everytime the ball gets too sticky until you've used about a full cup and the dough develops a nice elastic un-gummy texture.

Form a nice ball. Then give it a light coat of olive oil.

Cover the bowl and let the dough rise for one hour. This time of year it can rise just fine on the counter. In the winter, your house might be too cold (mine always is) so put the bowl in the oven with the lightbulb on -- that provides enough warmth for perfect rising.

Make some garlic oil now too. Just slice a clove of garlic into a teacup and cover with olive oil. Let this rest while the dough rises.

After an hour, your wee ball of dough will look like this. Heat your oven to about 475, and position one of the racks at the lowest setting.

Cut your dough into however many pizzas you want to make.

I only made one pizza tonight, so I made the leftover dough into a new ball, covered the bowl, and stuck in the fridge for another pizza -- it will rise slowly overnight and be ready for lunch or supper tomorrow. If it gets too big, punch it down and it will grow some more for the next day.

Flour a suitable surface (I use a pizza peel).

Add the dough you want to use and roll it out, adding a bit flour and/or flipping it over as necessary to keep your rolling pin from sticking.

Put some fine cornmeal on a cookie sheet. (You could use a pizza stone, but I find they don't make a big difference -- cookie sheets heat up pretty quick and yield great results with less fuss.)

Move your rolled dough to the cookie sheet and add some of that nice garlic oil you made earlier.

Now, get ready to make awesome crust! Pizza crust is one of my favourite things, so I put a bit of extra effort into it. I dress the crust with sea salt, grated parm, and fresh rosemary.

But first, you need a nice crust base. Pinch a bit of the dough over with your right hand. Then put the index finger of your left hand where the index finger of your right hand is and make a new pinch right beside the first. Work your way around the pie until...

...you have a nice pinched crust edge. (My girls have become pros at this!)

Then add a light dusting of salt, your grated parm, and the chopped rosemary and you will be set for an awesome crust.

Next comes the pizza toppings. I don't mind prepared sauce, but you're more than welcome to make your own. I also like fresh basil, bacon (breakfast left-overs!), onions, and home grown aji limon chiles! For mozza, I like tre stella -- the full fat stuff (don't use skim mozza -- it's just a huge eraser disguised as cheese). One of these mozza balls is NOT enough for 4 personal pizzas, it will work with three, and is great for two.  Plan accordingly!

Pizza sauce goes on first.

Then the basil leaves (they will incinerate if placed on top of the cheese).

Then the cheese (mmmmmm cheeeeeeese).

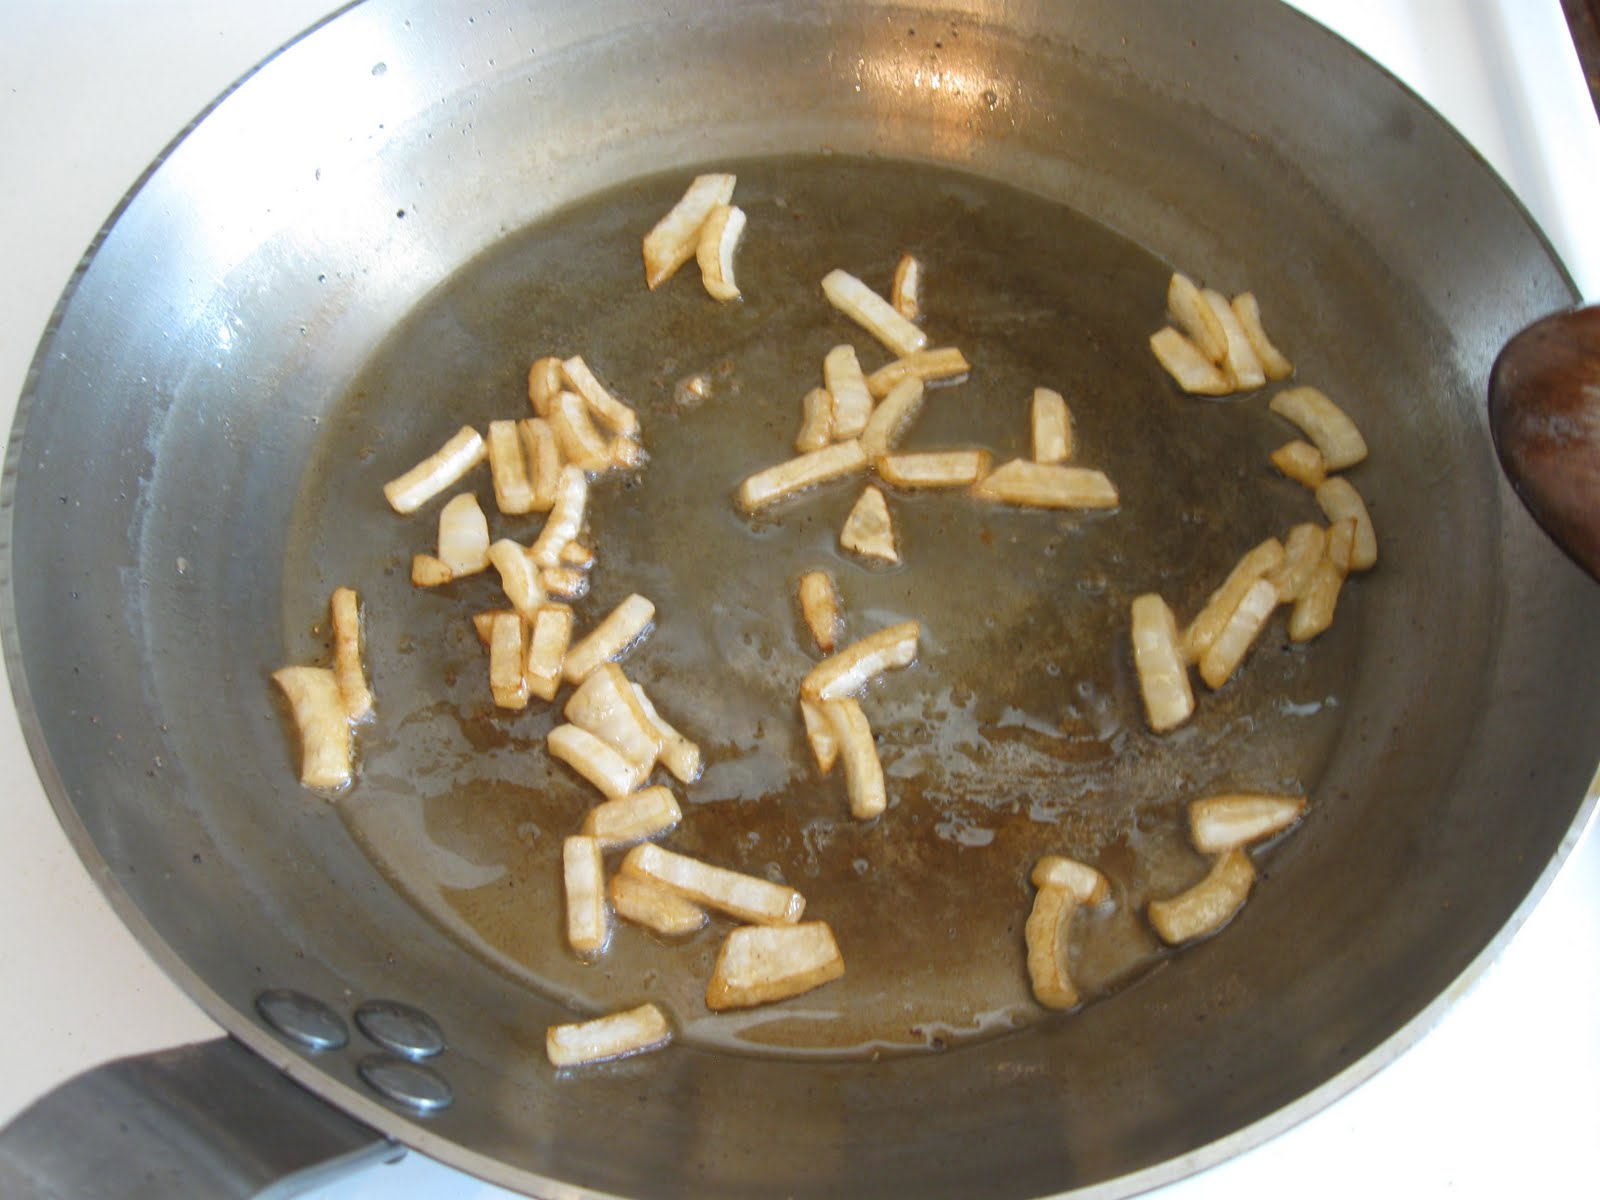
Then the bacon, onions, and chiles. You can also add the garlic from the garlic oil you made -- it will be WONDERFUL! Fire it in the oven for 12 minutes (I like to turn the cookie sheet around 180 degrees at the halfway mark -- watch out! It's hot in there!).

Then take your creation out of the oven and let it rest for a couple of minutes before slicing -- unless you happen to like molten, sticky strings of mozza oceaning all over your kitchen.

Serve with red, white, water, or beer -- it's all good. And if you have good company too, then you are truly blessed! Mangia!

Friday, August 20, 2010

Colman Andrews is driving me crazy.

I went to Farmboy today to cash in on this great sale of wild Coho salmon steaks -- sadly, I was a day early (stupid flyers). I was bummed-out for only a moment however, because I soon spied a beautiful piece of Irish salmon on the ice. I hesitated for a second, having locavore tendancies, but then realised that Ireland is probably about as close to Ottawa as B.C. is, so why not?

I knew I'd seen a whole chapter on salmon in Coleman Andrews's The Country Cooking of Ireland, and figured I should do right by this Irish fish by cooking it in a traditional way. I thought I'd hit paydirt when I came across a recipe for honey roasted salmon -- apparently the prehistoric folks in Ireland cooked it this way (although how ANYBODY knows THAT is beyond me -- I mean, it's "pre"-history, right?).

ANYWAY, I dutifully followed the recipe (which I won't detail here, since as you may have guessed from the title, it doesn't really work). I made the glaze with wine, lemon, and honey (which I thought looked too thin, but onwards!). Poured it on the fish (still seemed kinda thin). Broiled for the recommended time (which seemed too short). Pulled the fish out (it wasn't done). Re-glazed (because, well, you know). And finished cooking the fillet to the normal and reliable 10 minutes per inch of thickness, and then it was finally done.

(Just a quick aside here. When you broil fish, it should be about 4 inches from the heat. The trouble with most ovens I've used is that the highest rack setting is too close, but the next lower one is too far. The solution is to...

...put the rack on the lower setting, but pop a muffin tin on there for your broiling pan. That gets you into the four inch zone.)

So, in the end this dish came out just fine -- in large part thanks to the great quality of the fish, in no part thanks to the recipe. The same thing happened with the oat cakes I tried from this book. In the end, I figured out a way to make something wonderful, but the recipe was only the beginning of the process. This can be fun in a way, since you have to take the initiative and solve a problem, but we only get to eat so many meals! You can't pull this stunt all the time, and two strikes in a cookbook gets it pretty close to the dust-collector shelf.

However, just like it was the the oat cakes, there is a nugget of inspiration there, and I'll be working on my own version of honey glazed salmon. Stay tuned!

So that's why Colman Andrews is driving me crazy -- I find great ideas in his book, but then get sent on a quest to figure out how to make them work (this is fine if you're a normal person, but not so great if you have one-track-mind-itis like me).

Anyway, three cheers for the fish!

Wednesday, August 18, 2010

Tuscan (a.k.a. African) eggs

I used to make this dish a lot during my tour in Malawi as a volunteer highschool math and science teacher (how's that for a mouthful of adjectives). You can read about some of my adventures on my friend Paul's blog, where I make an occasional cameo. Markets in Malawi were sometimes a little thin. At the time, it was the poorest country in the world next to Mozambique (which happend to be at war, so it was a little worse off). However, you were pretty much guranteed to find tomatoes and eggs at the market, and usually onions too. These are the fundamental components of this dish, so ... you guessed it ..., I made it whenever tomatoes, onions, and eggs were all I could get my mitts on.

In spite of its humble components, it's actually a great dish, and I'm glad that I dredged it out of the depths of my culinary memory. I tried to find something similar in my cookbook collection, but no dice (this is a well researched blog, despite its devil-may-care appearance). There was, however, a scrap torn from an old Fine Cooking (Oct/Nov 2002) with a Tuscan Poached Eggs recipe that fit the bill (it didn't tell me much, but at least yielded a few timings to make this memory experiment a little less risky). It also resonates with the whole Eat Italian phase I'm going through right now. (Although this is about to come to an abrupt end tomorrow when they pull two wisdom teeth out of my head -- I will then be in a Drink Smoothies phase, which will be WAY less fun.)

This dish is pretty simple. First sizzle-up some onions, oregano (or whatever), and hot pepper flakes (if you want) in olive oil until they are nice and soft and blended.

Add a mess-o' chopped tomatoes (there are about 6 romas and 1 regular one in here -- the regular one adds juice which you will need for this recipe to poach your eggs). Simmer away until the tomatoes are broken down and the sauce is nice and juicy (I can't remember how long, but it's like ten minutes or so).

Then, make little dents in your sauce (one for each egg). Break your eggs into teacups so you can add them gently. Pour one egg into each dent, pop the lid on and let it simmer for about 3 minutes. Meanwhile, heat your broiler. (I could have fit 4 eggs in this pan, but only wanted two for supper -- I'll save the extra sauce for a quick huevos rancheros replay in the morning for brekkie -- HEY! MAYBE THESE ARE MEXICAN EGGS!)

Here's what they look like after the simmer. You can leave them a little longer and do the whole thing on the stove top, but I like the extra flavour that comes from a quick blast under the broiler. Pop them under there for another 2 minutes or so.

Here's how they look after that (I guess I should have mentioned you need an oven proof pan). You can eat up now, OR you can go the extra mile (and by now, you should know that I'm an extra mile kida guy). So....

Scoop the eggs and some sauce into a serving dish, sprinkle with cheese (Reggie, romano, cheddar, whatever) and pop the dish under the broiler for a few seconds until the cheese melts. How awesome does THAT look?!?!

Serve up with bread, or rice, or just eat it like that if you want. A choice way to prepare eggs. You can do this in ramekins if you want to get fancy, or on a nice serving platter -- whatever.

Get crackin'!

Sunday, August 15, 2010

Cook, Eat, Smile

I went to the new Julia Roberts movie Eat, Pray, Love yesterday and got pretty inspired by the Italian food in the show (although I did cringe when a pasta alla carbonara came out with tomatoes in it, but I'll deal with that in another post).

This dish is called pasta puttanesca. It hails from the Silver Palate Cookbook, and has long been in my repetoire because this is one of the first cookbooks I ever bought -- and one of the first recipies I tried from it. Sadly, it hasn't been served in quite a while since there are several kid-unfriendly ingredients in there, but since the mice are away I can call up this long lost friend and bring back some memories!

Puttanesca apparently has something to do with Ladies of the Evening. I've seen several explanations for how this link to the pasta sauce came about. It won't endorse any of them here, but it certainly is an interesting and varied set of explanations.

The recipe I have calls for canned tomatoes, and in winter (or if you're in a big hurry) that makes perfect sense. However, it's summer, and I'm not in a big hurry, so this is a perfect chance to use some of that nice fresh garlic I got the other day, and this huge pile of local organic tomatoes I got this morning at the farmer's market. Oh yeah.

Start by putting a pot of water on to boil for your noodles.  Add a good dose of salt once it's hot.

Then heat some oil in a skillet and add some crumbled oregano.

Chop your tomatoes and add them to the pan. I used about 6 roma tomatoes here and that made enough sauce for two -- or one plus tomorrow's lunch! Romas are great for this since they aren't loaded with juice, and yield a nice thick sauce quickly. You can use juicier tomatoes, you'll just have to cook it down for longer before adding your other ingredients.

Speaking of which, here they are. Anchovies (about 4), a tablespoon of capers, a handful of olives, a couple cloves of garlic, 1/2 a teaspoon of pepper, and a teaspoon (or as much as you can take) of chile pepper flakes -- see what I mean about kid-unfriendly? (Note: you don't need any salt -- there is enough in the ingredients to carry the whole dish.)

Essentially, you just add the ingredients to your tomatoes as you have them ready. Pit the olives, chop the garlic, chop the anchovies, etc. The idea here is to have a chaotic explosion of flavours with every bite. You want to feel like you got hit by lightening or something. To do that, the ingredients go in as fast as you can get them in, and only spend a little while cooking together. This keeps the flavours from blending into a harmonious whole like they would in a long-simmered sauce -- think of an orchestra tuning their instruments versus an orchestra performing. Here, all the elements stay distinct, and surprise you as they play a different tune with every bite.

To keep true to this idea, I suggest you crush the pepper with a mortar and pestle so it stays in fairly large chunks and packs more punch.

Your noodles should be cooked about the time your sauce is ready.

I recommend you serve this with pecorino romano since it has a salty punch that is in keeping with the rest of the dish. Reggiano would be fine too, but it is a bit more mellow. You may also want a glass of wine (red, of course -- just sayin') and a hunk of bread. Mangia!

And, if you over did it -- and I hope you did, since that's the whole point of this meal -- a nice glass of Galliano on ice will help restore your equilibrium. If you were thinking "Whew, I'm so glad he stopped talking about Galliano" then sorry!, but if you were thinking "Where is he going to fit Galliano into this one" then :D

Cook, eat, and smile.

Friday, August 13, 2010

G-steak

STRIKES AGAIN!!

I suffer from, in the words of my Dad and Grandma, a "one track mind." This means that when I have an idea, I pretty much have to run with it until it runs its course (and I have a new idea, or the old idea and I get sick of each other). This has been the cause of some concern throughout my life, but I was relieved when my oldest daughter started doing the same thing. Clearly it's genetic, so I can no longer be held responsible for my affliction. Whew! Ok, confession is over: ten Hail Marys and get back in the kitchen!

I was wondering, in my one-track-mind way, if that Galliano sauce I made the other day would work with a less complicated preparation. So, I gave it a whirl with steak (you may have guessed this from the title of the post, and please excuse the titile -- it just popped in my head and, well, I had to run with it).

NOTE: This recipe (and the other one) creates considerable "recipe smell" in the house. If you have to live with one of those unfortunate people that don't like "recipe smell" then I suggest you fire up the kitchen fan full speed, cook this when they're out of town, or just take your lumps and enjoy the good eats!

I started with the recipe for bistro steak, and went up to the point where you pull the steak out of the oven. Now, you may be wondering: "Hey, what the Hell is Joe doing cooking a steak in the house when it is summer AND a sunny evening to boot?!" Well, let me just say that sometimes your neighbour has a huge load of laundry on the line, and sometimes the wind is blowing towards their house, and, being a charcoal user, you wonder if they are like you and really do prefer "forest fire" to the "mountain breeze" smell they usually have on their laundry. Anyway, I think they are more "mountain breeze" people, and abstained from the fire. So here we are in the kitchen.

Basically, I just switched Galliano for the bourbon in the bistro recipe. Once the pan comes out of the oven, toss some onions in there to sauté for awhile. These will cool the pan a bit so that when the booze hits you don't flambé your eyebrows off. Keep the heat on about medium for this process.

Next step is to add the Galliano. I used 1/4 cup, but you could go for the proportions in the bistro steak recipe if you want lots of sauce (1/3 cup booze, 1/2 cup of cream). The pan should be cool enough now to avoid an inferno, but if you have a gas stove, you're on your own and I absolve myself of all responsibility!

Let this bubble away and reduce. Once your spoon starts leaving tracks in the sauce it's getting thick enough for the cream.

Add 1/3 cup of heavy cream (or 1/2 a cup if you are on the lots-o-sauce track) and let that heat through. Now, you need to reduce the cream down to thicken the sauce, but you don't want it to separate (i.e. turn into thin watery goop with clumps of milk in it). To avoid this keep the temp at a nice gentle bubble, and if it starts to look in danger...

...tilt your pan to cool it and collect the sauce into one spot so the heat evens out.

Again, keep reducing until your spoon leaves nice tracks -- how do you like the Speed Spoon in the photo?! (Your steak should be somewhere under cover resting right now, by the way.)

Then serve up! Skip the usual starches and serve this puppy with steamed yellow beans (which are wonderful right now: I hope you have a farmer's market nearby!) and tomatoes (which are also wonderful!) I dressed the tomatoes with some salt, pepper, and a splash of balsamic vinegar (which they don't really need, but which I like, so there).

And the verdict? Did it work? All I can say is "Oh yeah!"

(The next recipe might not have Galliano in it, but you never know...)