There is some debate as to what we're up to with this stage of the process. After a week in your primary fermenter, most of the fermentation of your brew will be done (in fact, you can drink it all now if you like, which is pretty much what beer was all about back in Viking times). Being more sophisticated and calm, however, we want to let the brew develop its full potential, and that's really what this step is all about.
The basic idea is to get your brew out of the primary fermenter and into a nice clean container. This transfer will leave behind all the gunky goo and dormant yeast that occurred during the first phase of fermentation, and will allow your concotion to age gracefully for a few weeks without the danger of decomposing goo messing-up all of your nice flavours. Fermentation will continue for sure (which is why this is sometimes called secondary fermentation), but the real goal here is to get the flavours to mingle and get to know one another. (You know how lasagne and spaghetti sauce are always better the next day? This is the same principle. Let's call it the Lasagne Principle and have it done at that.) It also allows the remainder of the yeast and other particles to settle out, clarifying your beer in the process.

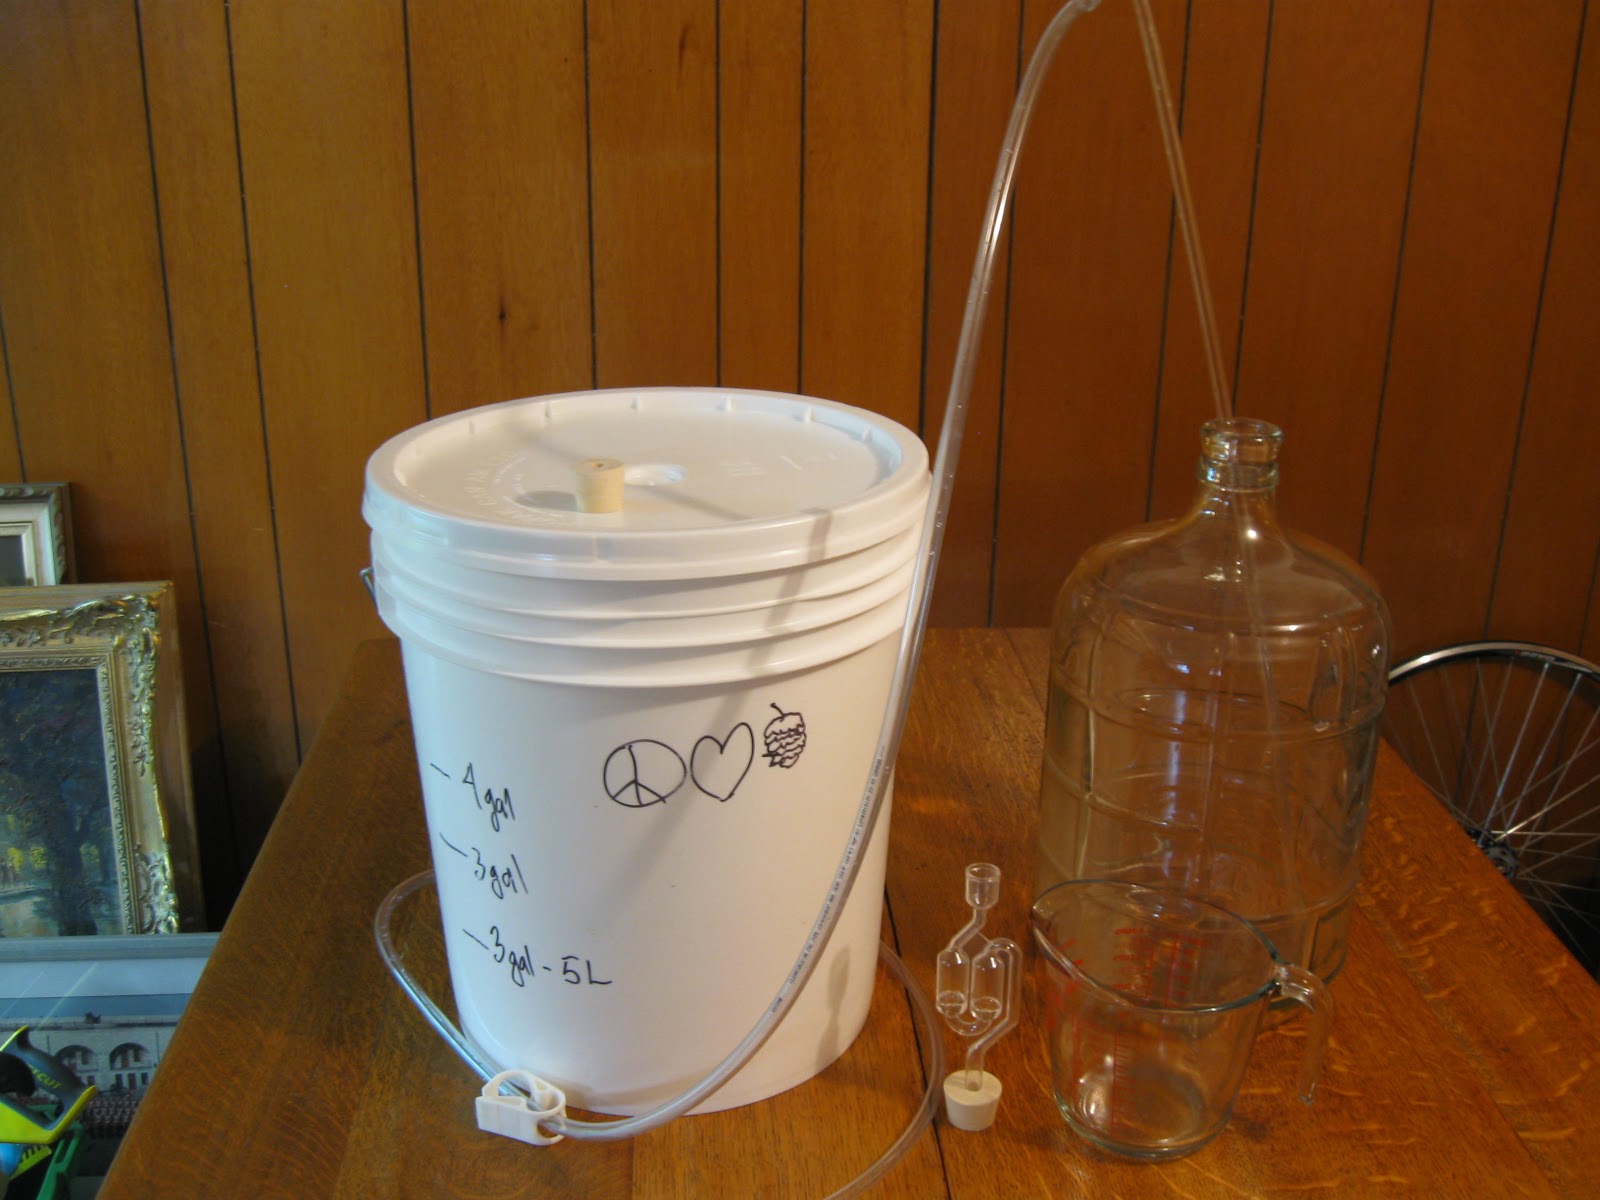
On the equipment front you'll need some flexible siphon hose, an inflexible tube that I'll call a carboy cane since it looks like a candy cane (stuck in the glass carboy in the photo), a carboy, an air lock and bung to seal your carboy when it's full, and a week-old batch of beer in a primary fermenter ready to go. The measuring cup is a good idea too, since it gives you somewhere to put your air lock until you're ready to use it.
Now, getting your brew from one container to another in a sanitary way is quite a trick. In the middle ages they skipped this whole step and just drank it now, so there's no advice to be had there. Nowadays, we have to use a siphon hose to do the transfer. Siphoning should be a whole branch of physics unto itself. Charlie devotes a whole appendix to the process. There are only two things you really need to know however: 1) liquid in a hose will always move from high to low no matter how many twists and turns there are on the way, and 2) no matter how much you know about it, physical reality will confound your knowledge and drive you crazy.
Ok, with that in mind, let's get started.
The first thing you need to do is sterilise a glass carboy. As you know, I'm a 3 gallon man, so here's my 3 gallon carboy with a gallon of water/Diversol ready to kill all the nasties in sight. As with the primary fermenter, I just swish this around now and then, wait for unspecified periods of time, and then rinse.
Key to the whole rinsing proceedure is this nifty piece of brass hardware. It's a little thingy (official term) that you screw on to your faucet (I had to look that up -- I thought it had a "w" but it's because of Charlie's Angels -- different Charlie -- and that poster -- may she rest in peace). If you have some kind of modern faucet in your basement, you're screwed and should change it as soon as possible.
Anyway, this thing lets you shoot water stright up into the air (or your bottle or carboy) when you push down the attached lever. It's brilliant, and it's indispensable! Once your carboy is sterile, rinse it with your brass doohickey several times to get all the chemicals out of there.
You also need to sterilise your air lock and bung. I sterilise a measuring cup at the same time, rinse it, then put the sterilised and rinsed air lock and bung in there so they are ready to go when I need them.
The air lock is a twisty tube with two water chambers in it. It keeps air from flowing into your carboy, but it allows CO2 to escape as the pressure builds up. It's brilliant! Just fill it so the water in the two chambers is at or below the "max" line, and you're all set.

Then, do your mise-en-place. Followers of this blog should have a good idea what mise-en-place is all about. It's a French term that essentially means "get all your shit together before you start anything." In this case it means getting your primary fermenter up on a table, having your sterile carboy ready on the floor nearby, having your air lock sterile and ready, having an extra bucket on hand, and having a wee glass available to sample your brew. This picture has some extraneous stuff associated with bottling (because I was doing a Grand Slam of brewing, racking, and bottling all in one day so I could post it here), but it gives you a general idea of how prepped you need to be -- don't freak-out, I'm sure you can overcome any oversight, however the more prepared you are the better, but in the end, remember "Relax...!"
Once your
place is all
mised, you have to sterilise and charge your siphon hose. I can't provide a whole lot of advice here, since it's basically a nightmare. My approach is to bottle one batch and rack another on the same day, which makes the whole sterilising-of-the-hose thing easier (see the next post). However, now and then I don't have a bottling operation on the go. On those days, my technique is to fill a big steel bowl with sterilising solution, soak the flexible end of the hose in the bowl while washing down the carboy cane on the outside. Once the outside of the hose and cane are clean, I rinse them.

Then, I charge the hose with water -- this invloves filling the hose with water. To do this, I make a couple of loops in the flexible end so I can hold it in one hand. Then I put the cane end over a bucket, and put the opening of the flexible end under a running tap. If you're lucky, water will start flowing through the tubes and into your bucket. If you're unlucky (50% of the time in my experience) you have a bubble somewhere and have to drain your tubes and try again. Anyway, once your tubes are charged, you are the King of Suction and can do anything you want! What you want to do now is put your thumb over the flexible end to seal the water charge in your tubes, then put the cane end of your carboy cane in the steriliser solution and the flexible end near your bucket on the floor. Then you take your thumb off the flexible end and your steriliser solution should flow through your tubes. Seal the flexible end once the tube is full of steriliser and just chill for a few minutes to make sure the inside of the tubes is sterile. Rinse the cane end that was in the steel bowl, then start running clean water through the tubes by putting the cane end over your bucket and the flexible end under the running faucet. See how long this takes to explain in words?! No wonder Charlie has a whole Appendix on it!! Anyway, after a few rinses your tubes should be clean. Charge them again with cold water and plug the flexible end with you thumb. Use Kung-Fu grip, because you don't want to have to re-charge. Trust me.

Head over to your mise-en-place place with your Kung-Fu grip and charged siphon tubes and get ready to rumble!
Open your primary fermenter. Eeew!
Put the cane end of your siphon in there ...
...(Kung-Fu grip still in tact).
Then get the flexible end over a bucket on the floor and let your thumb go! The water in the tubes should start pulling the beer down through it.
Once the water is out and you're running pure beer, plug the end with your thumb again, head over to your little glass, and pour out a wee sample of your batch!
Then stop the flow with your thumb again, move the flexible end into your carboy, and let 'er rip! Keep the end close to the bottom of the carboy to avoid too much splashing.
It's a good idea to tilt the primary fermenter a little so you get as much brew as possible into your carboy.
Once your brilliant elixer is moved over, stop the flow in the tubes (that little white clamp helps at this point). Remove the siphon from the carboy, and add your air lock. You should see an instant reaction in the air lock -- the yeast is still active and will start pushing air through the twisty curves right away.
This can now bubble away for a few weeks or months. It's good to keep the carboy out of the light, so I plunk it into the box it came in. I usually decide to bottle once it is clear that nothing is going through the air lock anymore. SOME people use a hygrometer to make this decision, but that's not my speed. I just wait and wing it.
Anyway, you did it! Rinse your primary fermenter and hoses to get all the gunk out of them, and treat yourself to a beer! You totally earned it!!
Next step: bottling!


I put 100% grain alcohol in air locks. This is necessary in south Texas where molds and yeasts abound and the weather is hot and humid for pretty much every month except February.
ReplyDelete